Creating your first post
📝 How to Create a Post on Hero Allies
Welcome to your guide for creating your first post — whether it's a deal, event, job, or opportunity. This step-by-step walkthrough will show you how to navigate your dashboard, purchase a post, and publish with confidence.
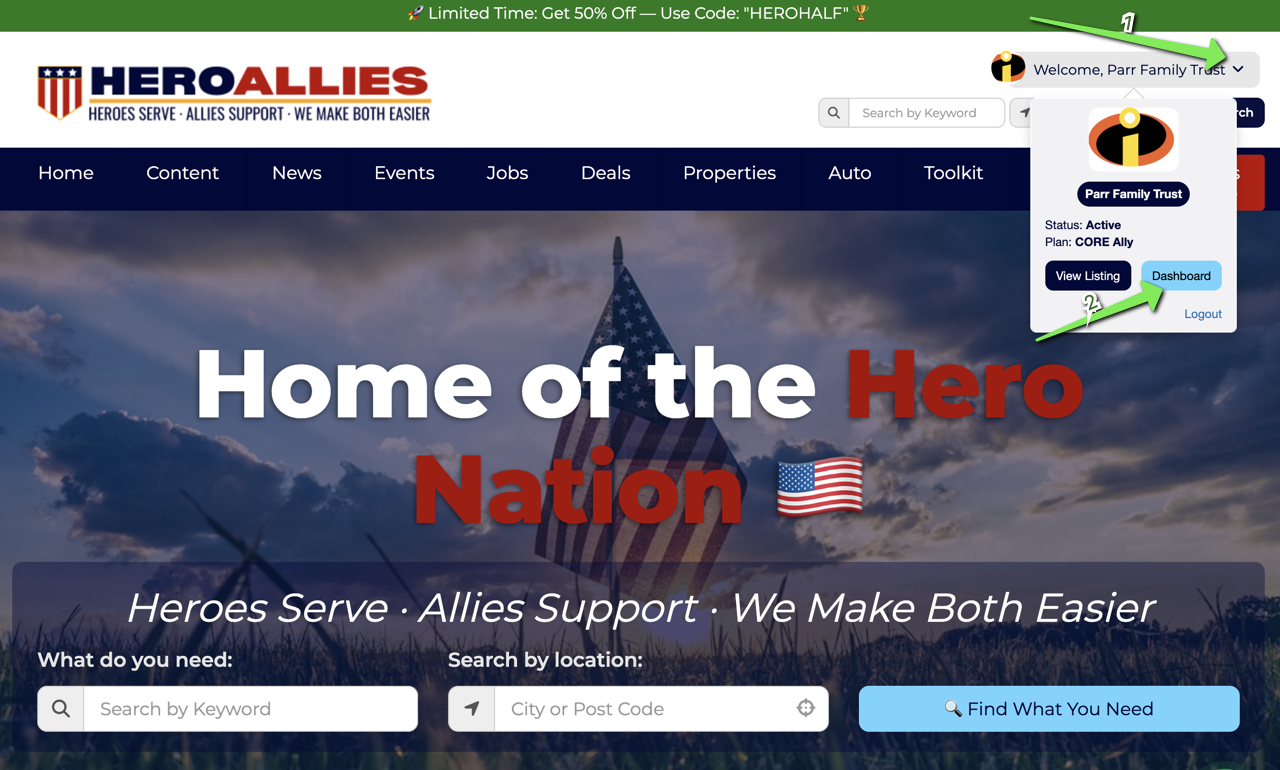
Step 1: Access Your Dashboard
-
Expand the Menu
On the top-right corner of the screen, click the icon to expand your menu. -
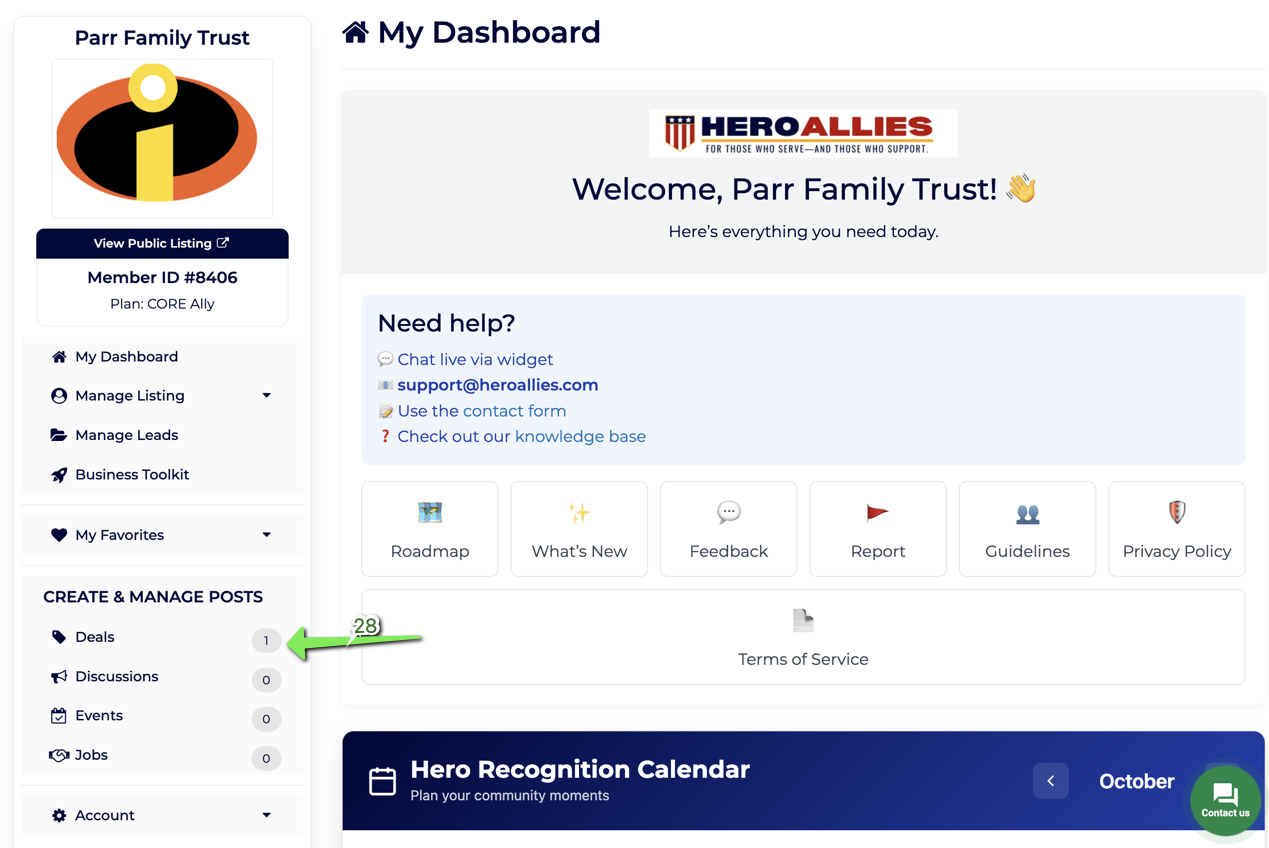
Click “Dashboard”
Select the Dashboard option from the dropdown.
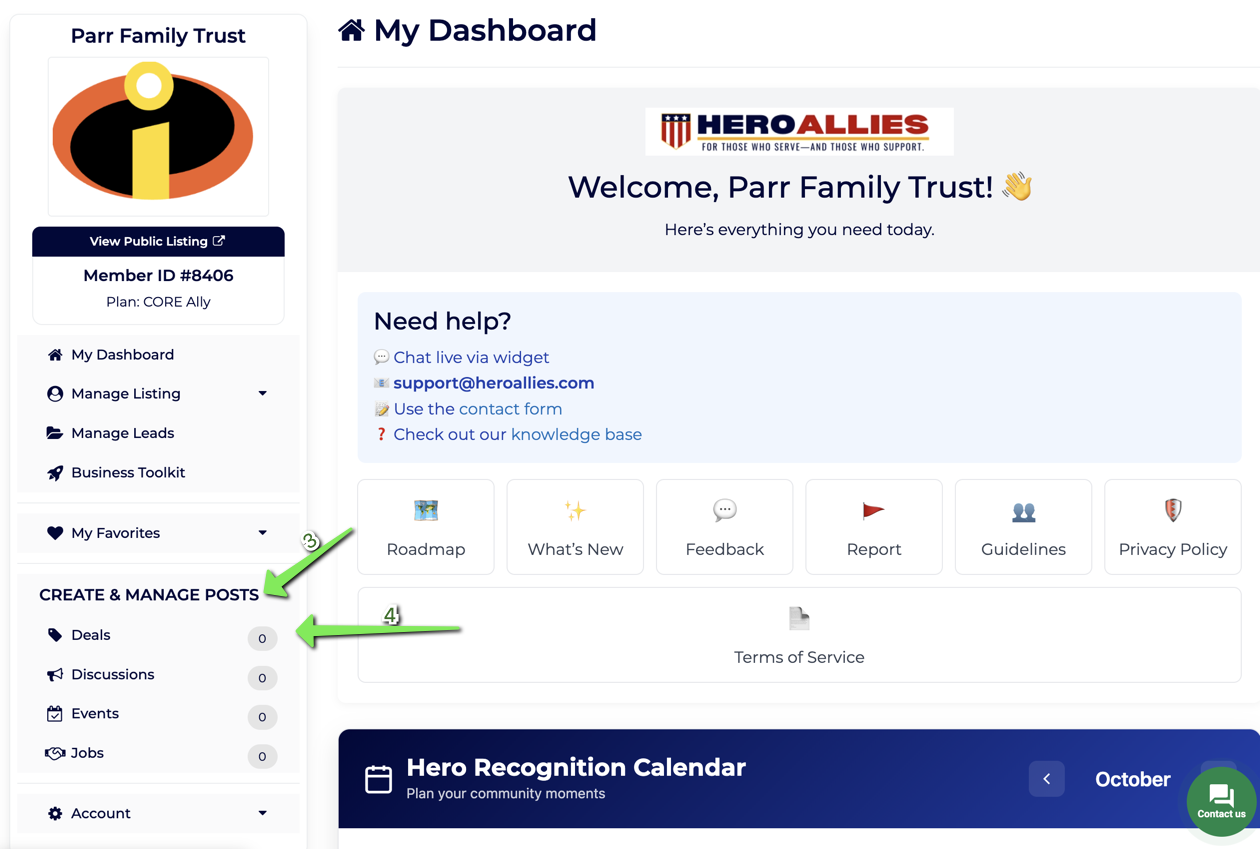
Step 2: Select & Purchase a Post
-
Navigate to Posts Section
In your dashboard, scroll to the section where posts are listed. -
Choose a Post Type (e.g., Deal)
Click on the type of post you'd like to create. In this example, we're choosing a Deal.
-
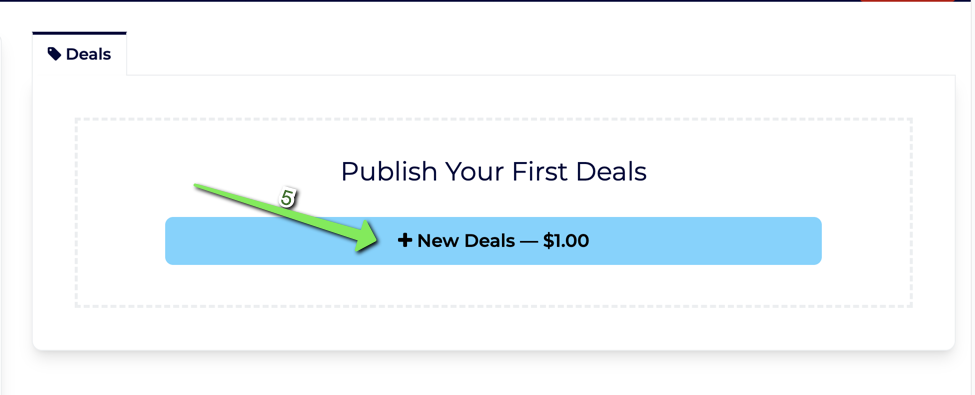
Purchase Your Post
Click the button to purchase the post (note: you get 5 free posts per year depending on membership tier).
-
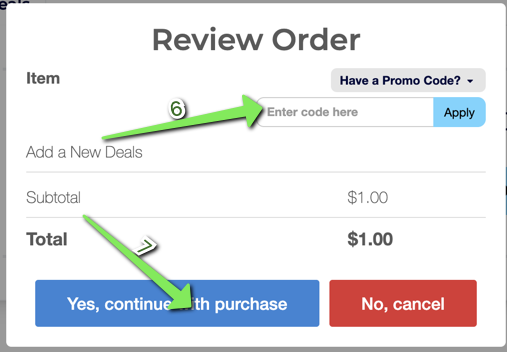
Enter a Discount Code (If Applicable)
If you have a code, apply it here. -
Complete Purchase
If you don’t have a code, just click Continue with Purchase.
Step 3: Fill Out Post Details
-
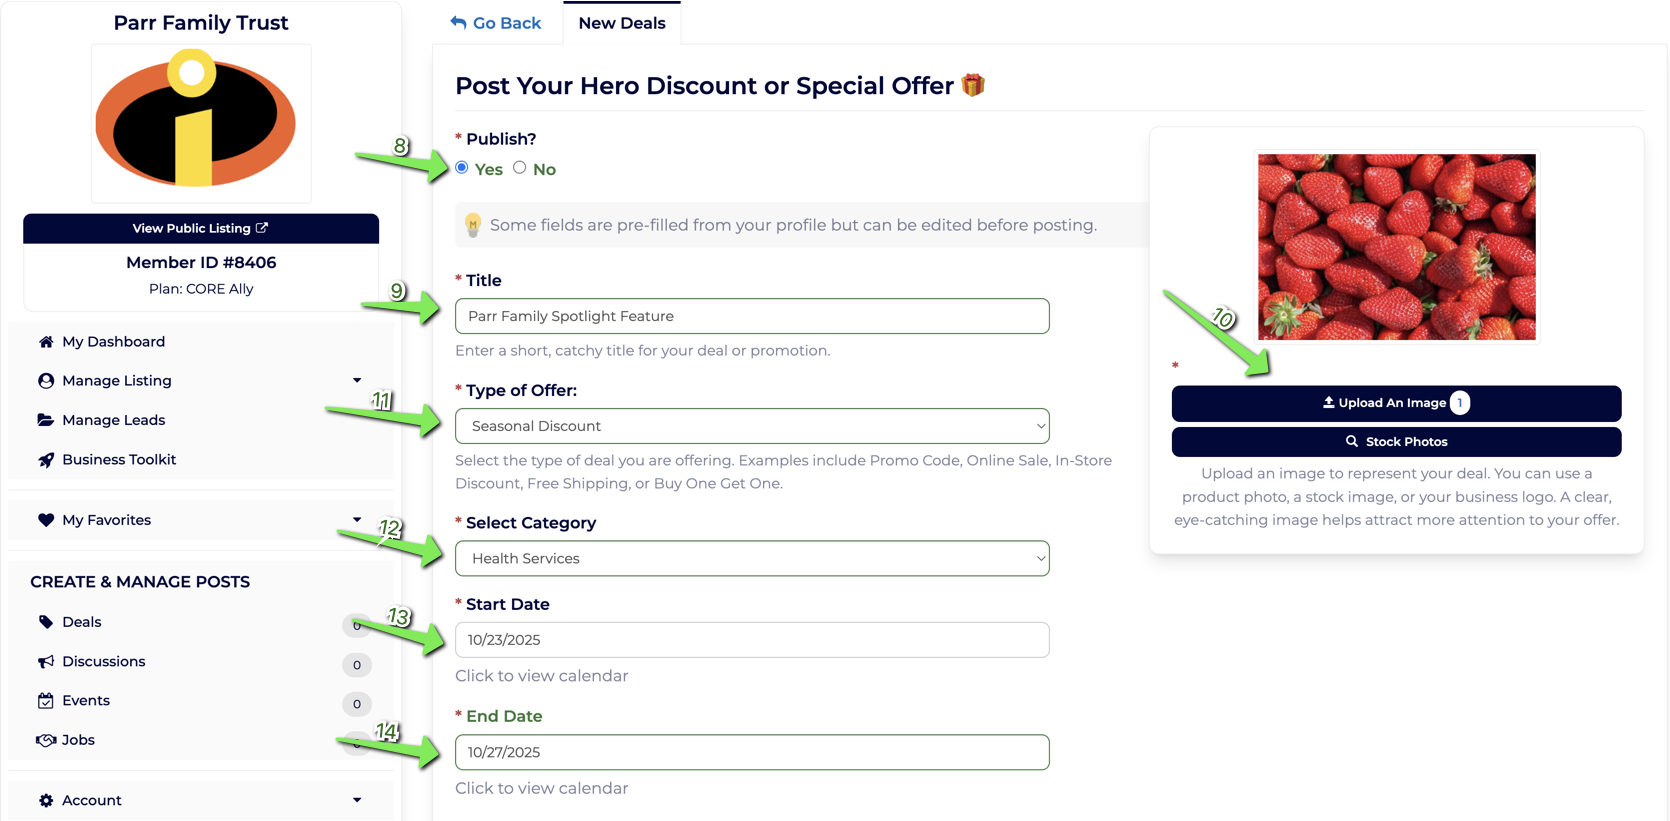
Choose Whether to Publish Now or Save as Draft
Select your preferred status. Unpublished posts will stay in Drafts. -
Enter a Title
This is what viewers will see first — make it count! -
Upload an Image or Use a Stock Photo
Choose an image that reflects your offer. -
Select the Type of Offer
Example: Discount, Giveaway, Flash Sale, etc. -
Choose a Category
Helps heroes discover the right content. -
Set Start Date
When the offer begins. -
Set End Date
When the offer expires.
-
Enter Promo Code
Optional — if you're offering a specific coupon. -
Redemption Link
Add the direct link for redeeming the deal. -
Business Name
This will auto-fill with your profile’s business name but can be edited. -
Contact Email
Add the best email for users to reach out with questions. -
Contact Phone
Optional, but helpful for local offers. -
Physical Location (if applicable)
Enter an address — the map will auto-fill it.
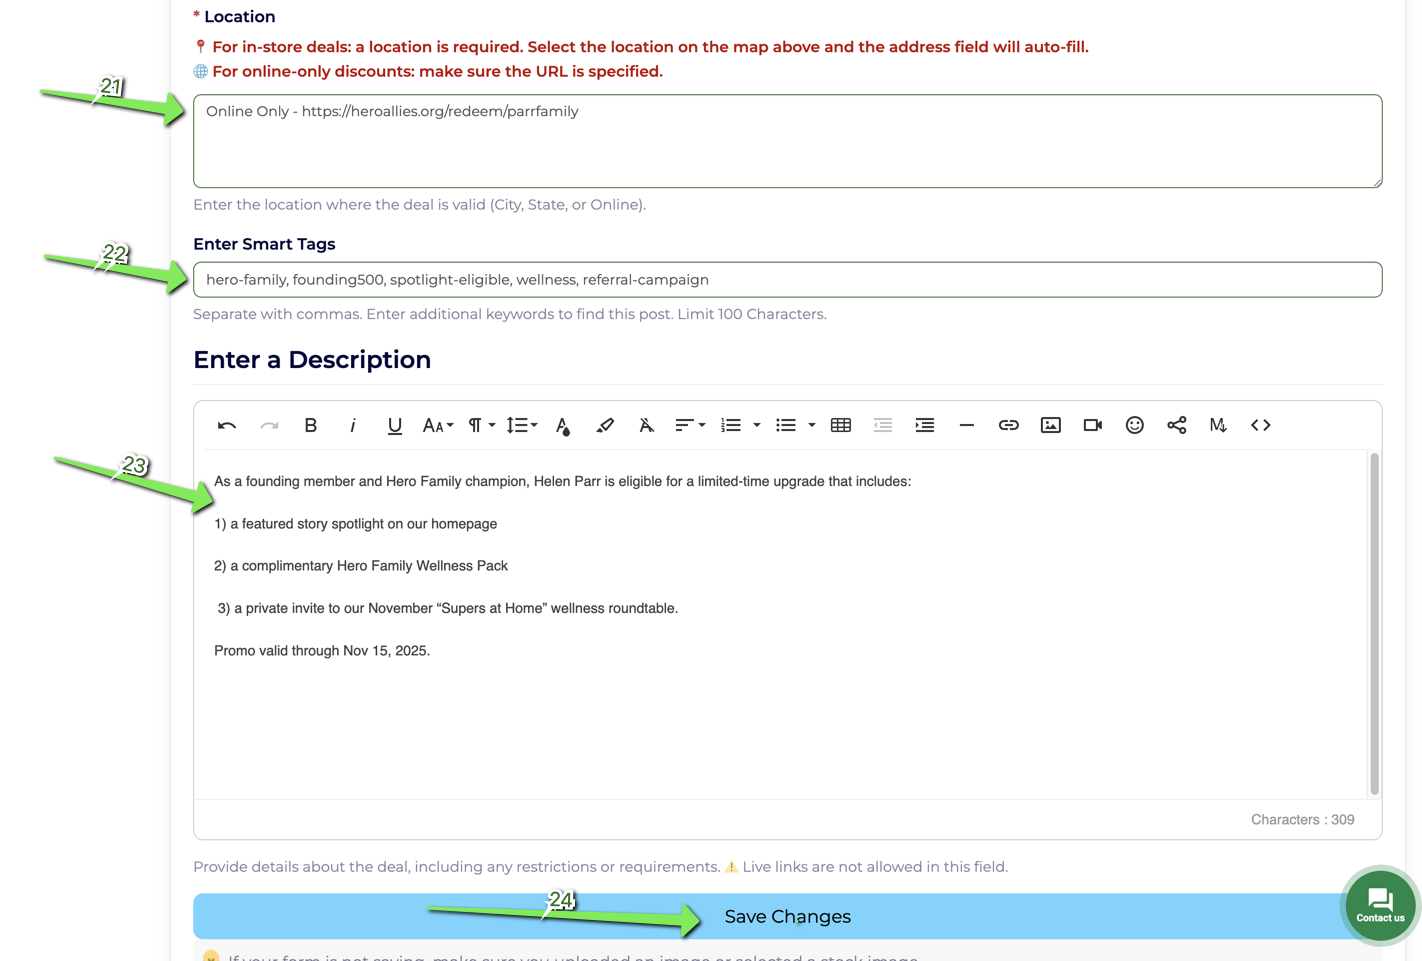
-
Online Event or Digital Offer?
If there’s no physical location, add your event URL or redemption link here. -
Smart Tags
Add keywords to improve visibility on Google and in search. -
Description
Write a compelling, helpful description of your offer or event. -
Click “Save Changes”
If you chose to publish, it goes live. If not, it’s saved as a draft.
Step 4: Confirm & View Your Post
-
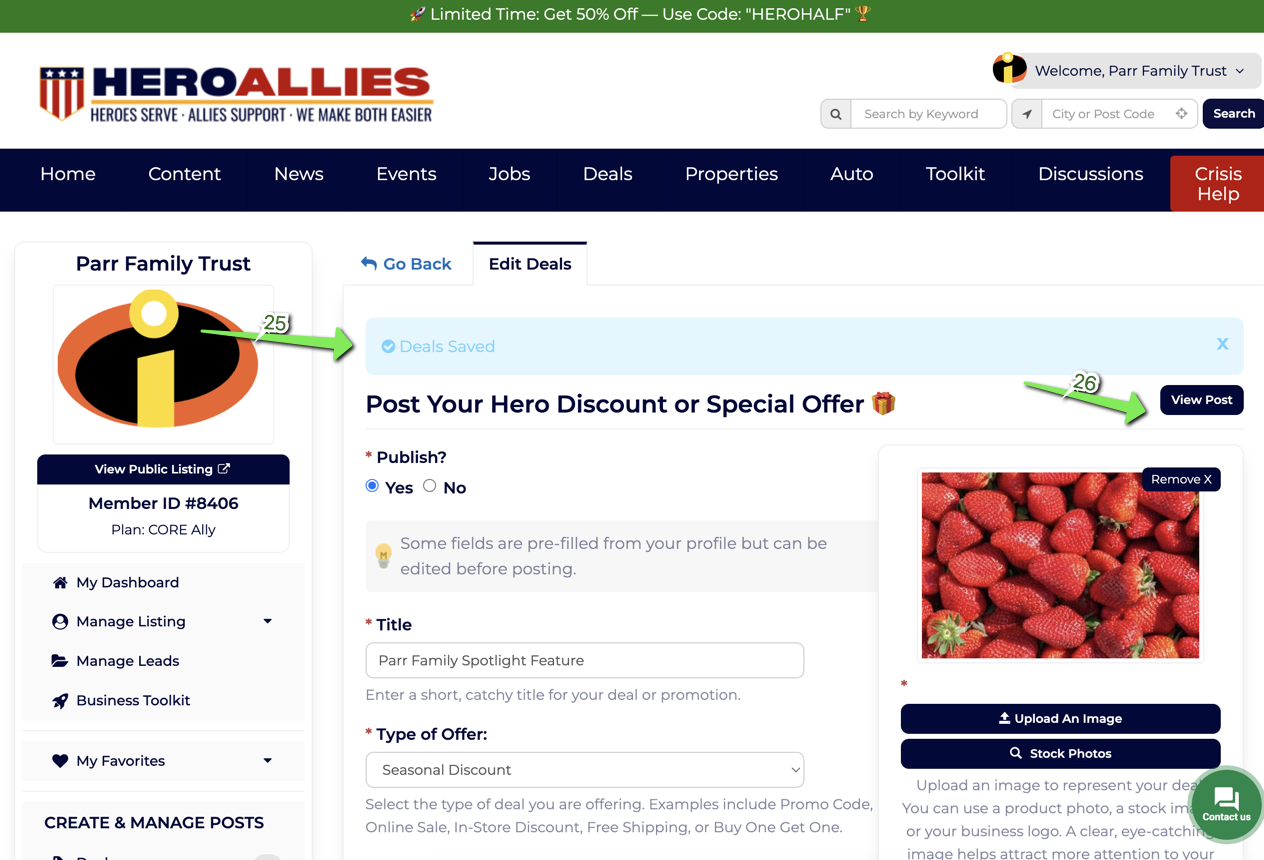
Confirmation Message
You’ll see a success message confirming your post has been saved.
Insert Image 9 here -
Click “View Post”
To preview what your audience will see. -
Published Link
Your post is now live at:
https://www.heroallies.com/deals
(or appropriate section like/events,/jobs, etc.)
- Dashboard View
Your new post will appear on your dashboard — manage it anytime from here.
🛠 Tips for Success
- Be Specific: Use clear, benefit-driven titles.
- Visuals Matter: Posts with high-quality images get more clicks.
- Time-Sensitive Deals: Use start/end dates to create urgency.
- SEO Boost: Smart tags help your post appear in searches.
- Track Engagement: Use your dashboard to monitor post views and engagement.
Need help? Reach out to our support team at support@heroallies.com or connect with us directly from your dashboard chat.
🔗 Go to Dashboard (you must be logged in) → heroallies.com/account/home